
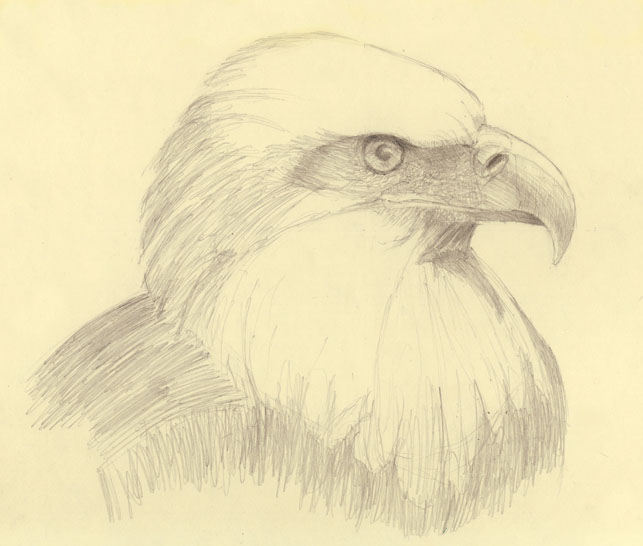
Drawing an eagle head can be a simple matter once you learn the basics. In this drawing the head is drawn with only a few lines and values. Every drawing, like every sequence of memorable events in
life, has its own chronology; that is, what to draw in the beginning, middle,
and end. As I have said before, sometimes drawing is more about the skill then
the subject. The task is to understand how do you accomplish the desired effect or look
of the drawing. Which in my opinion is
often getting the basic elements right, this could also be the feel of the subject too. But is it right to think about detail first? Yes, in the sense of the look. But no, because you want to make sure
your structure is correct before you draw the detail. The glue that hold this dilemma togethere is how to put the two
together. The answer; how you begin. I want to point out to you the importance of how to stage the detail. So take particular attention to the setting up the drawing.
Tips:
Tips:
1. Make a quick sketch on a separate paper of the eagle head to become familiar with the basic feel of the shapes before you start your main drawing and to loosen-up.
2. Place a scrape paper down to rest your hand on so you don't smear the graphite.
3. Work the whole drawing at once.
2. Place a scrape paper down to rest your hand on so you don't smear the graphite.
3. Work the whole drawing at once.

Circle composition.

Step 1. Draw a circle and cross lines, keep the lines light so they are easy to erase. Draw the circle at least 5 inches in diameter so the small details will be easier to control. The bigger the better.

Step 2. Draw the outline continue to keep your lines light.
Notice the negative shapes and the placement of the eye.

When drawing consider the negative shapes as a means to draw the positive shapes. Also rotate the drawing up-side down and look at the shapes. This technique will change your perspective and help you see it fresh. Tip 1: Try turning both the drawing and reference image up-side down. This will help you see the shapes clearly.

Step 3. Erase all grid lines
Layer 1. Work the whole drawing and establish most of the shapes in the same value. Sometimes referred to as the poster look.
Tip 2: draw lightly, don't fill in your lines completely and draw in the direction of the form and texture.

Layer 1. Detail around eye.

Layer 2. Refine light and dark areas. In the dark areas draw more lines in the direction of the shapes and textures. These dark areas should subtly go lighter as you draw into the lighter areas.
Tip 3: Add more lines and apply pressure, but not too much. Thinking in terms of value as the accumulation of lines will help you control the texture. Draw in-between the lines and apply a little pressure will create the necessary value changes to establish textures.

Layer 2. Detail of values to create texture

Layer 2. Detail outlined areas indicate subtle changes in value in and around the head.

Layer 3. Use the kneaded eraser to draw highlights. In areas that are too dark push and pull the eraser into the graphite to lighten those areas. The feathers are simple and should at least have 3 different values.Continue to add values and finish.
Tip 4. To create a texture using the kneaded eraser simply shape or add a texture and push and lift on a graphite covered area.
Okay, the only thing left to do is make sure your drawing is the way you want. The key with any kind of drawing is to draw and draw and draw. Eventually you will become awesome!

Related books and products links on this topic
______________________________________________________________________________
Bornowski Books

Add a comment